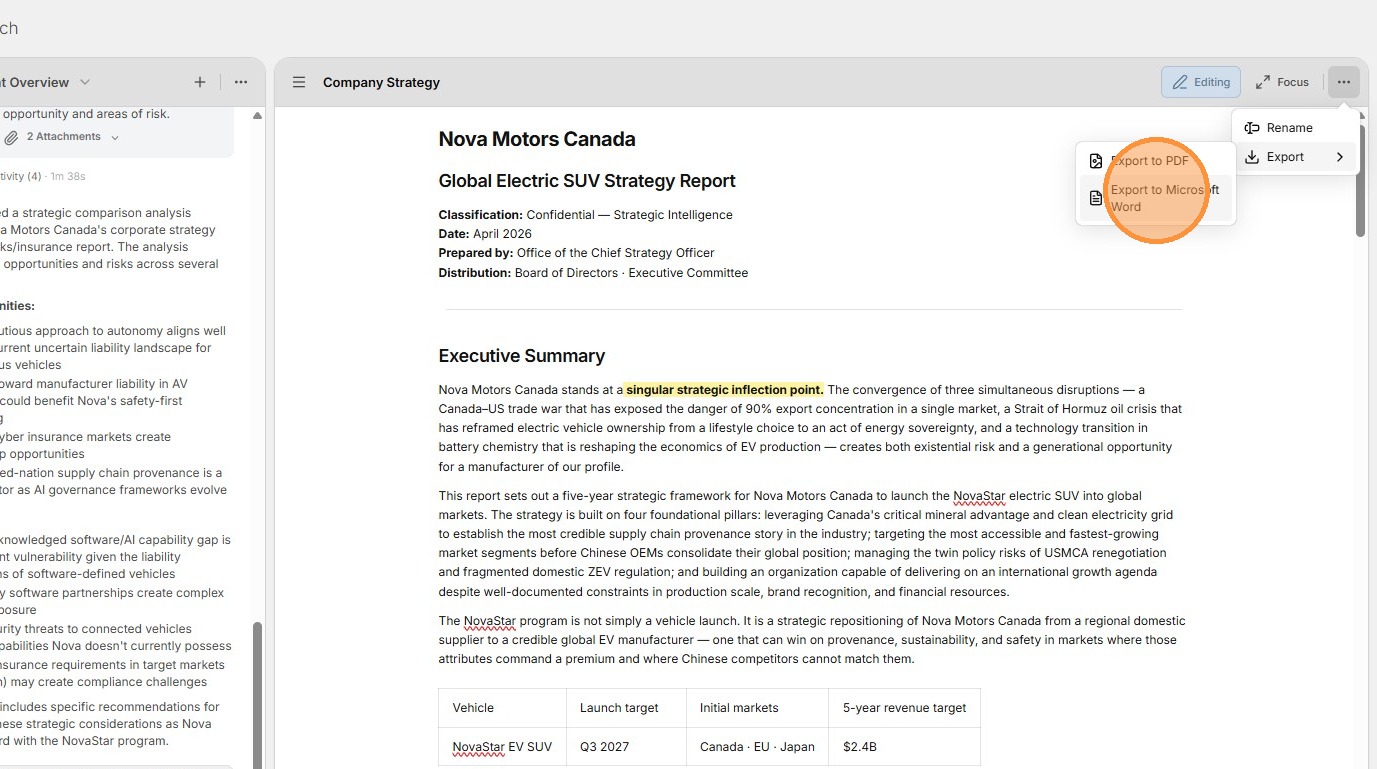
Learn how to create and edit documents. This guide covers the interface for creating and adding headers, lists, tables, images, links, and more. You will also learn how to export documents from the platform.
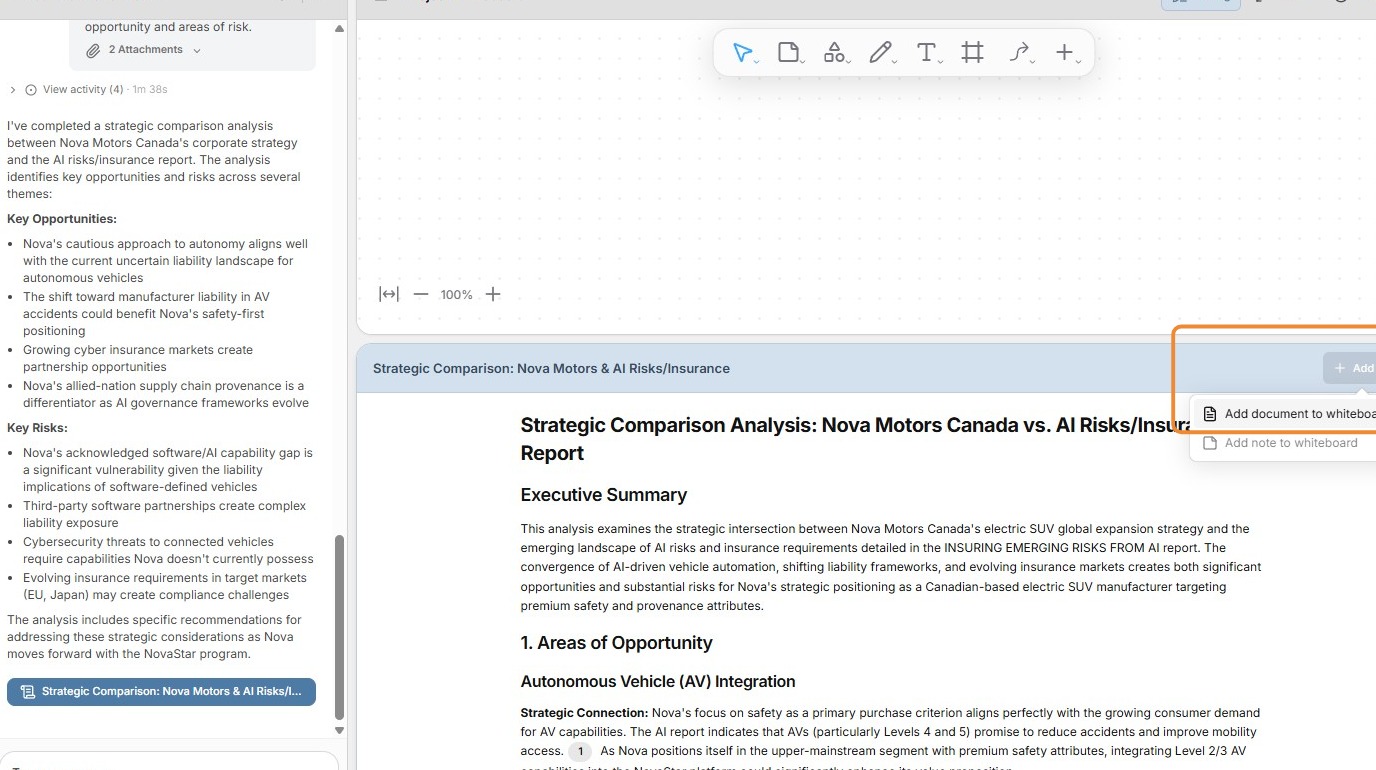
1. You can convert Task Results generated by AI agents into permanent documents by clicking the Add button in a Task Result.
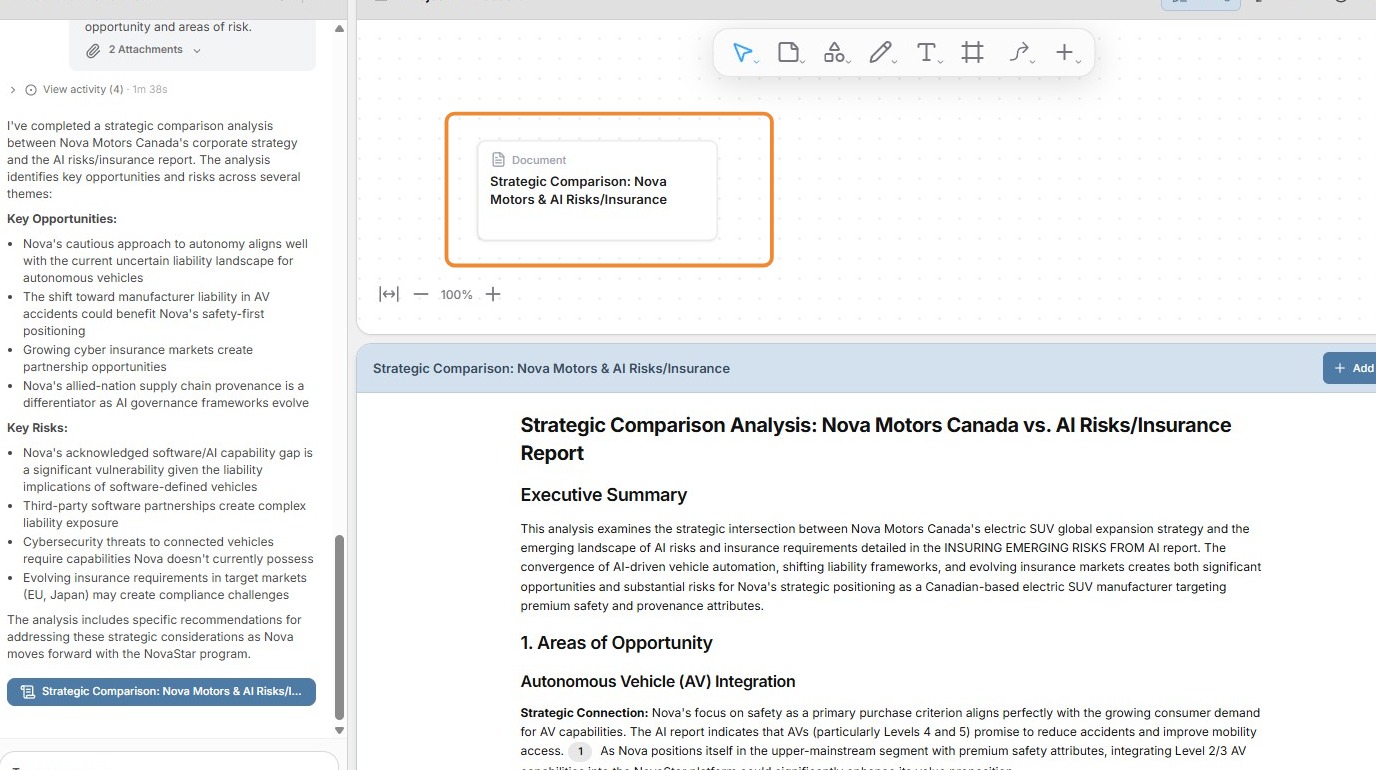
2. The Task Result will be converted to a document and added to the Project Whiteboard.
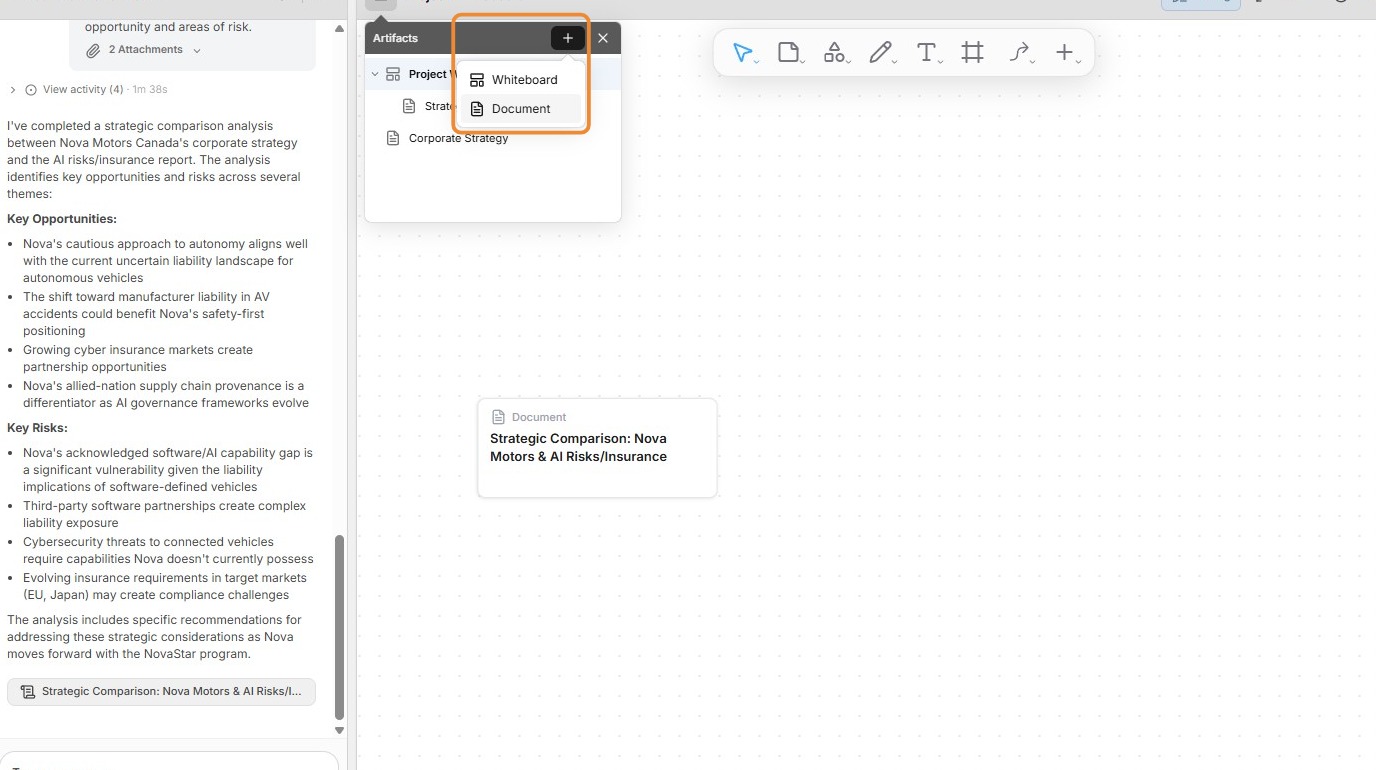
3. To create a new document from scratch, click the + button in the Artifacts menu from the Project Whiteboard and select Document.
4.
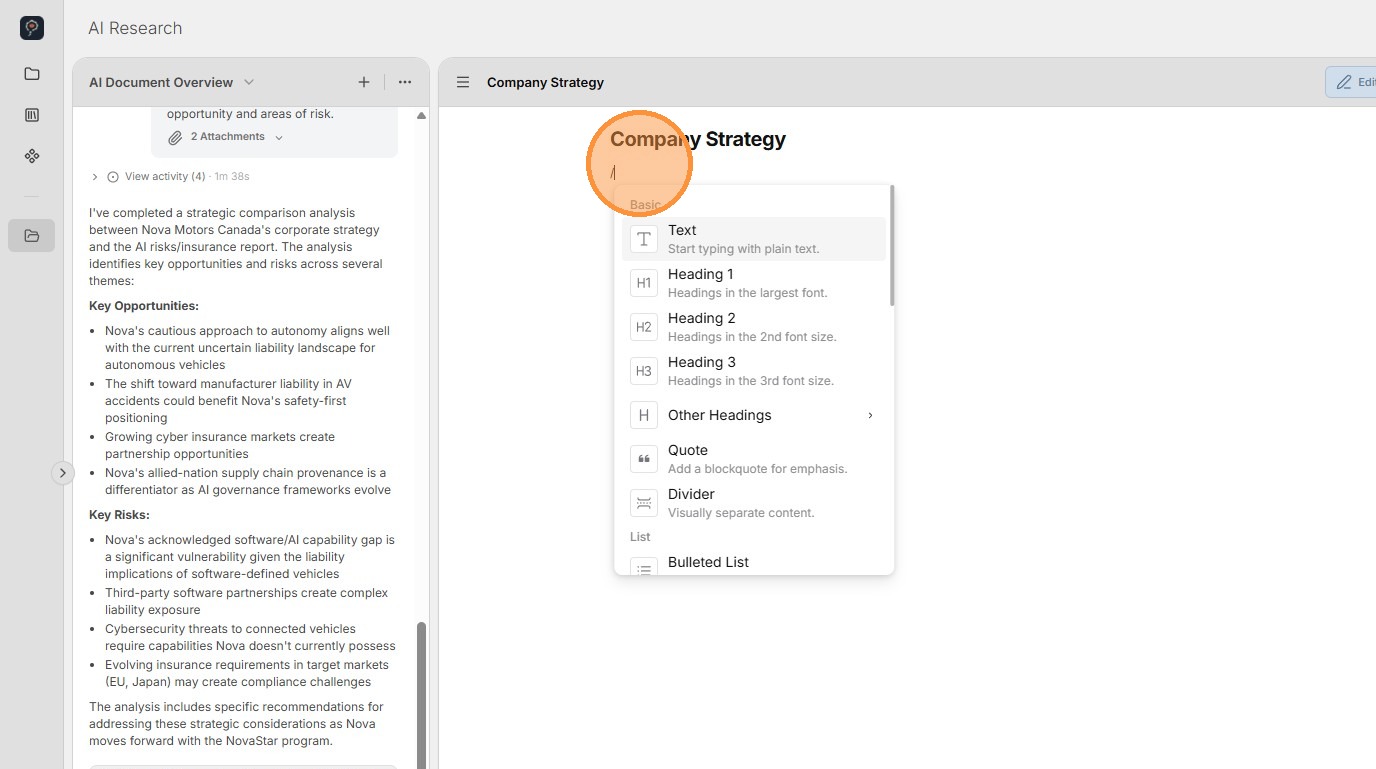
To begin adding text, click near the top-left corner of the document. A / will appear. You can either begin typing text directly or open the formatting menu.
To open the formatting menu, press the / key. You can then choose from a range of formatting options, including headings, quotes, divider lines, lists, images, and more.
5.
It is possible to copy and paste from external documents, though merging formatting does not always work. For example, Microsoft Word formatting is often lost. This will be fixed in a future release.
If you want to preserve your formatting, convert your document to Markdown first. This format generally pastes well into the document editor.
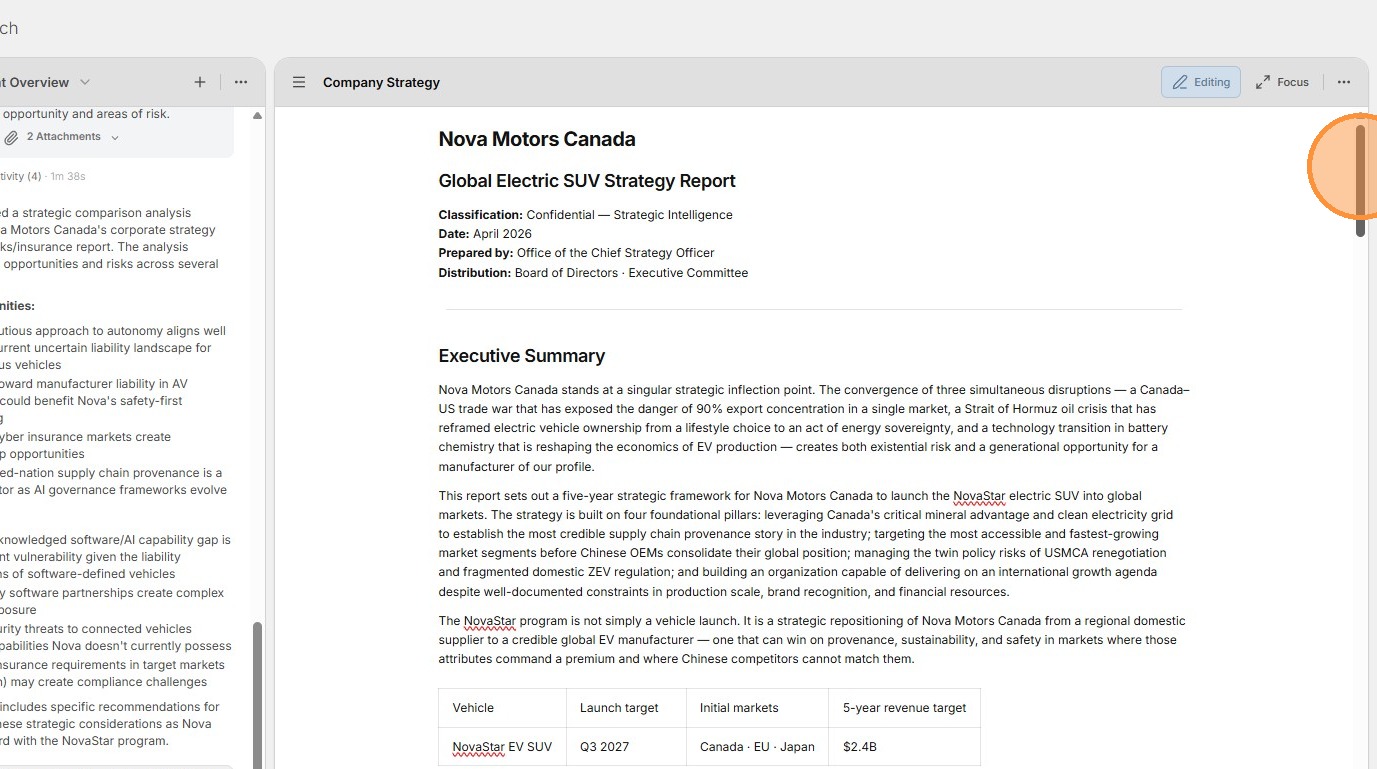
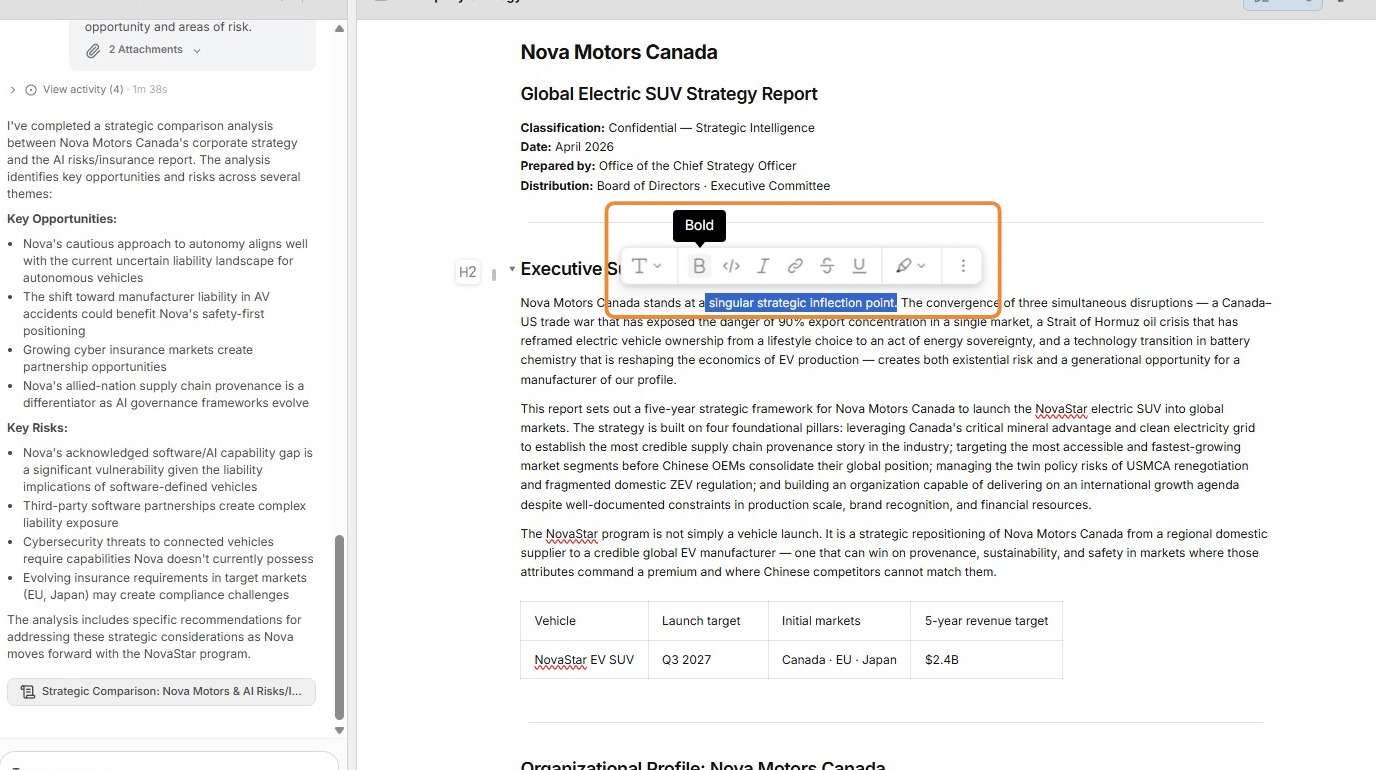
6. Selecting a section of text will load a context menu where you can change the font, apply formatting, highlight the text, add a URL link, and more.
7. To export a document, click the ... menu in the top-right corner. You can export to PDF or Microsoft Word. If a workspace has an Export Template configured, that template will be used to format the exported document.